BeagleBoneGreen ArchLinux インストール
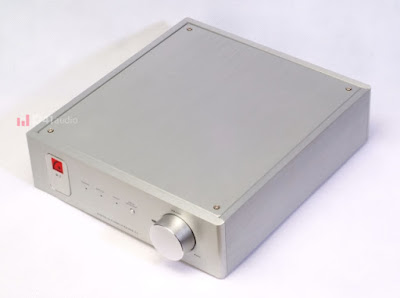
ケースの工作から間が空いてしまった。あまり本人がニーズを感じていないせいもある。億劫がらずに作業を進めることにした。やる事といえばArchLinuxのインストールとMPDの構築だけである。今まですんなりできたことがないので中々手が付けられないのである。
先ずは、マイクロSDHCカードにArchLinuxをインストールする。使用したカードは、GREENHOUSE 4GB class4である。EDION、YAMADA等のチラシを見て安売りしている時に購入したものである。
インストールの手順は、ArchLinuxArmのサイトの指示どおりやってみた。
サイトのurl
https://archlinuxarm.org/platforms/armv7/ti/beaglebone-black
踏み台としてVoyageMPDが動くAlix3D2を使う。普段は、USBHDDを接続してNASにしている。誤ってUSBHDDをFDISKで消去したくないので外して作業することにした。USBカードリーダーにマイクロSDHCカードを挿してからAlix3D2に接続
予めSDカードのディバイス番号を確認しておく。
root@voyage:~# ls /dev/sd*
ArchLinuxArmのサイトの手順 ・・・・・2年位前と手順が変わっている。
1.Zero the beginning of the SD card: ・・・・・なんの事だか分からないがこのままやってみる。
dd if=/dev/zero of=/dev/sdX bs=1M count=8
sdxは、自分の環境に置き換えて 今回は、sdaでやってみた。
2.Start fdisk to partition the SD card:
fdisk /dev/sdX
sdxは、sdaでやってみた。
c.のところは、使用するSDカードによってsectorの表示が変わるので迷うところである。
数値を入力しないでデフォルトのままリターンすれば問題ない。
4.Create and mount the ext4 filesystem:
sdx1は、sda1でやってみた。
5.Download and extract the root filesystem:
エラー表示は、出るがこれで問題なく出来る。
6.Install the U-Boot bootloader:
7.Insert the SD card into the BeagleBone, connect ethernet, and apply 5V power.
先ずは、マイクロSDHCカードにArchLinuxをインストールする。使用したカードは、GREENHOUSE 4GB class4である。EDION、YAMADA等のチラシを見て安売りしている時に購入したものである。
インストールの手順は、ArchLinuxArmのサイトの指示どおりやってみた。
サイトのurl
https://archlinuxarm.org/platforms/armv7/ti/beaglebone-black
踏み台としてVoyageMPDが動くAlix3D2を使う。普段は、USBHDDを接続してNASにしている。誤ってUSBHDDをFDISKで消去したくないので外して作業することにした。USBカードリーダーにマイクロSDHCカードを挿してからAlix3D2に接続
予めSDカードのディバイス番号を確認しておく。
root@voyage:~# ls /dev/sd*
ArchLinuxArmのサイトの手順 ・・・・・2年位前と手順が変わっている。
1.Zero the beginning of the SD card: ・・・・・なんの事だか分からないがこのままやってみる。
dd if=/dev/zero of=/dev/sdX bs=1M count=8
sdxは、自分の環境に置き換えて 今回は、sdaでやってみた。
2.Start fdisk to partition the SD card:
fdisk /dev/sdX
sdxは、sdaでやってみた。
- Type o. This will clear out any partitions on the drive.
- Type p to list partitions. There should be no partitions left.
- Now type n, then p for primary, 1 for the first partition on the drive, 2048 for the first sector, and then press ENTER to accept the default last sector.
- Write the partition table and exit by typing w.
c.のところは、使用するSDカードによってsectorの表示が変わるので迷うところである。
数値を入力しないでデフォルトのままリターンすれば問題ない。
4.Create and mount the ext4 filesystem:
mkfs.ext4 /dev/sdX1
mkdir mnt
mount /dev/sdX1 mnt
5.Download and extract the root filesystem:
wget http://os.archlinuxarm.org/os/ArchLinuxARM-am33x-latest.tar.gz
bsdtar -xpf ArchLinuxARM-am33x-latest.tar.gz -C mnt
sync
エラー表示は、出るがこれで問題なく出来る。
6.Install the U-Boot bootloader:
dd if=mnt/boot/MLO of=/dev/sdX count=1 seek=1 conv=notrunc bs=128k
dd if=mnt/boot/u-boot.img of=/dev/sdX count=2 seek=1 conv=notrunc bs=384k
umount mnt
sync
7.Insert the SD card into the BeagleBone, connect ethernet, and apply 5V power.
カードリーダーからsdカードを外してBeagleBoneGreenに挿し電源接続
8.Use the serial console or SSH to the IP address given to the board by your router.
ここが何時も躓くところだが今回は、BOOTSWを押すとかuenv.txtを差し替えるとかしなくてもすんなり起動してきた。IP検索ソフトを使ってIPアドレスを調べてみると192.168.0.4らしい。
Tera TermでSSH接続してみる。ユーザー名、パスワードともにrootを入力
あっさりSSH接続できてArchlinuxが立ち上がっているのが確認できた。
こんなに簡単にできたのは、初めてである。 *訂正 emmcから起動したdebianだった。BOOTスイッチを押さないで電源を入れたので普通にemmcから起動しただけなのは当たり前か。
今日は、ここまで。
IP固定とかパッケージの更新とかMPDのインストールをやりだすとまたトラブルだらけになるかもしれないが今日は、これで良しとする。
8.Use the serial console or SSH to the IP address given to the board by your router.
- Login as the default user alarm with the password alarm.
- The default root password is root.
ここが何時も躓くところだが今回は、BOOTSWを押すとかuenv.txtを差し替えるとかしなくてもすんなり起動してきた。IP検索ソフトを使ってIPアドレスを調べてみると192.168.0.4らしい。
Tera TermでSSH接続してみる。ユーザー名、パスワードともにrootを入力
あっさりSSH接続できて
今日は、ここまで。
IP固定とかパッケージの更新とかMPDのインストールをやりだすとまたトラブルだらけになるかもしれないが今日は、これで良しとする。


コメント
コメントを投稿